DJI Workflow
KlvInjector can convert DJI drone telemetry into MISB 0601 metadata and multiplex it with video to create STANAG 4609-compliant files or streams.
See DJI Metadata List for the metadata fields generated from DJI logs.
Use Follow Mode rather than FPV Mode for better results.
Export DJI Telemetry
You can extract telemetry by any method that produces MISB-compatible CSV or JSON files. The easiest options are:
https://www.airdata.comhttps://www.phantomhelp.com/LogViewer/Upload/TXTlogToCSVtool
Airdata Export
- Upload the flight.
- Download the telemetry in CSV format.
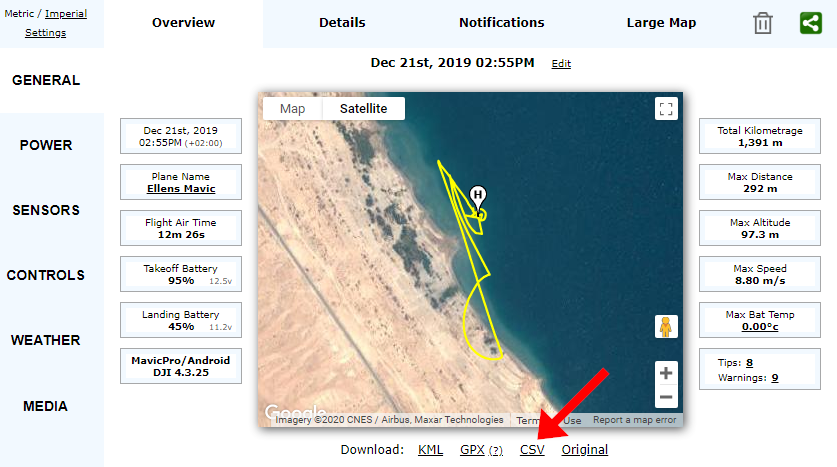
Figure: Airdata CSV export workflow.
PhantomHelp Export
- Upload the flight.
- Download telemetry in Verbose CSV format.
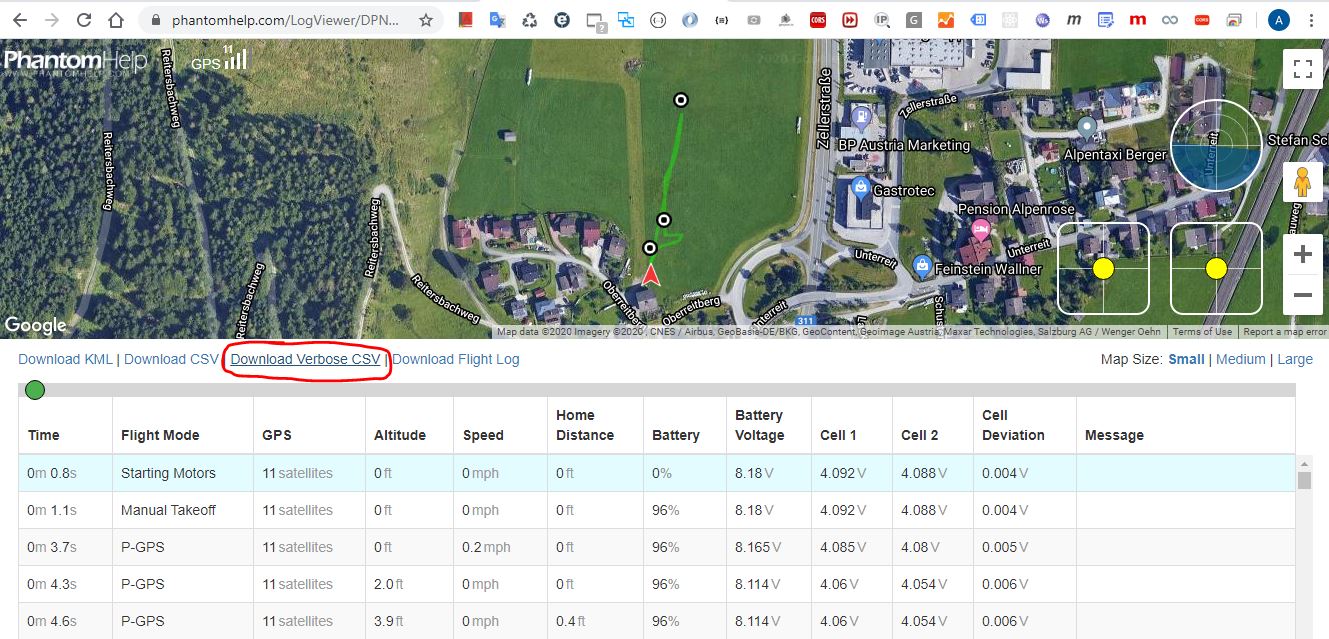
Figure: PhantomHelp verbose CSV export workflow.
PhantomHelp output may have altitude issues, so validate the exported values before relying on them.
Convert To STANAG 4609
1. Select The Video File
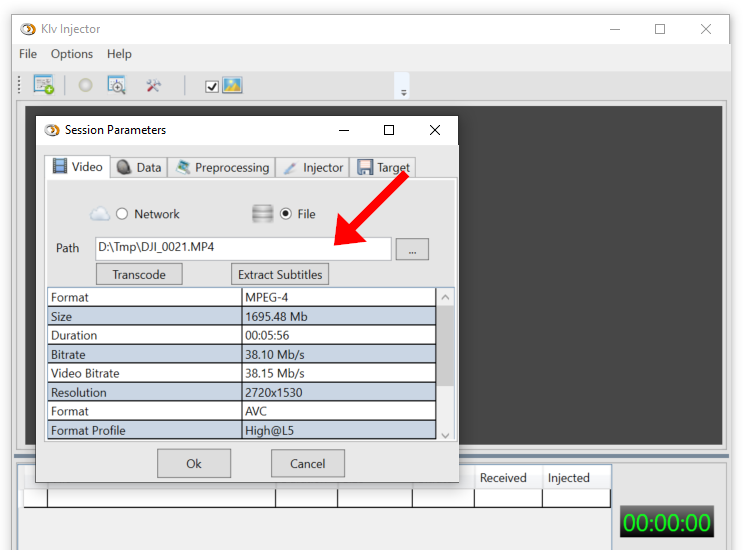
Figure: Selecting the DJI source video.
2. Remux Or Transcode To TS
DJI videos are typically .mp4 or .mov, so they need to be remultiplexed or transcoded into MPEG transport stream format.
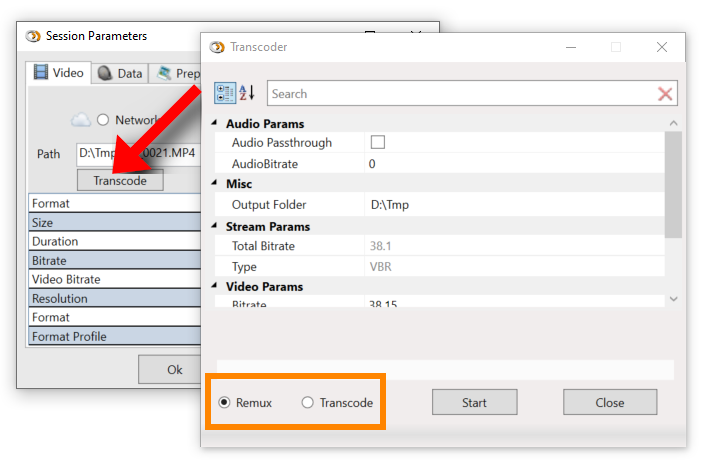
Figure: Remuxing or transcoding the DJI video to TS.
If you do not need to change the video resolution, bitrate, or codec settings, use remux mode. Full transcoding of high-resolution 4K material is CPU intensive.
3. Select The Telemetry File
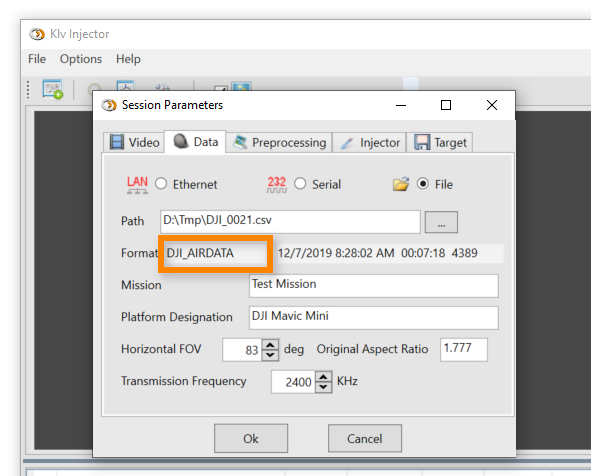
Figure: Selecting the DJI telemetry file.
Once the CSV file is loaded, KlvInjector detects its format and exposes static fields that you can supplement based on the drone model and mission context.
Field of view and sensor aspect ratio are critical for correct corner-point calculation. Use the values from the drone or camera manual.
4. Add Optional Static Metadata
You can add static metadata such as a Security Local Set by using a .json or encoded .bin packet.
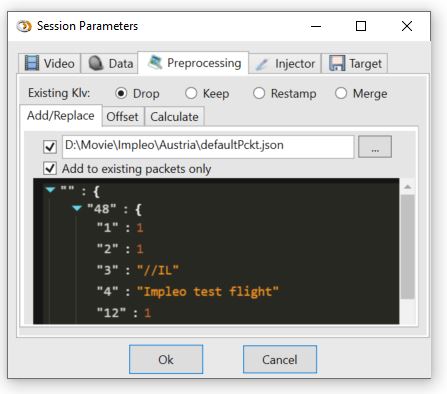
Figure: Adding static metadata to each generated packet.
5. Set Telemetry Offset
If video recording and telemetry logging do not start at the same time, either trim the source file or apply an offset.
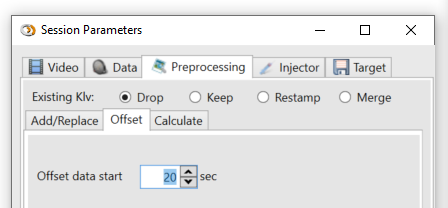
Figure: Applying a telemetry-to-video time offset.
6. Configure Footprint Calculation
Set frame-center and corner-point calculation options, and configure ground elevation either manually or via an elevation server.
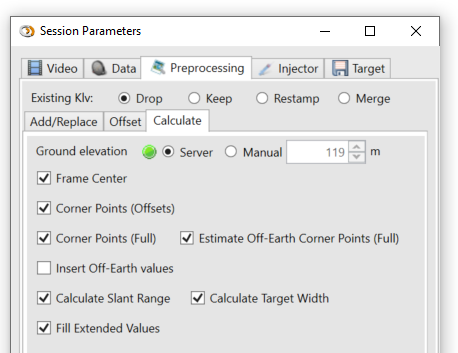
Figure: Configuring frame-center and corner-point estimation.
DJI logs do not provide frame-center or corner-point telemetry directly, so KlvInjector estimates those values from the available flight data. See Corner Points and Elevation Server.
The calculation is based on simplifying assumptions and can be inaccurate in mountainous terrain or when the required optical parameters are wrong.
7. Configure Injection And Targets
Set any remaining static metadata, select synchronous or asynchronous KLV mode, and configure the output target.
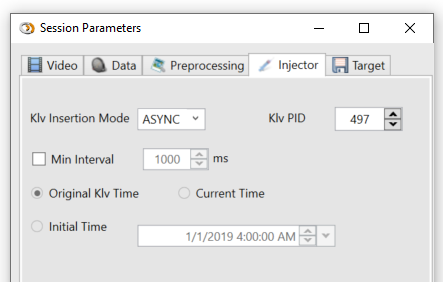
Figure: DJI workflow injector configuration.
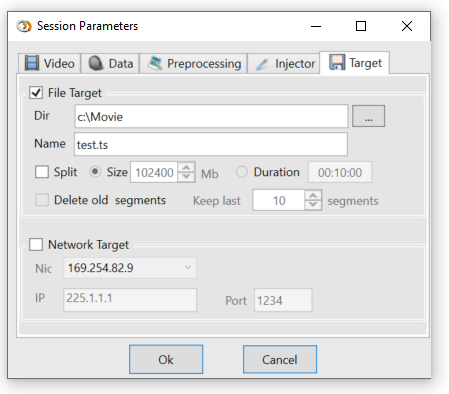
Figure: DJI workflow target configuration.
8. Choose Preview Mode
Select real-time preview for monitoring or disable preview for faster-than-real-time processing.
![]()
Figure: Choosing between preview mode and faster processing.
9. Start Processing And Review Output
Start the workflow and inspect the injected metadata.
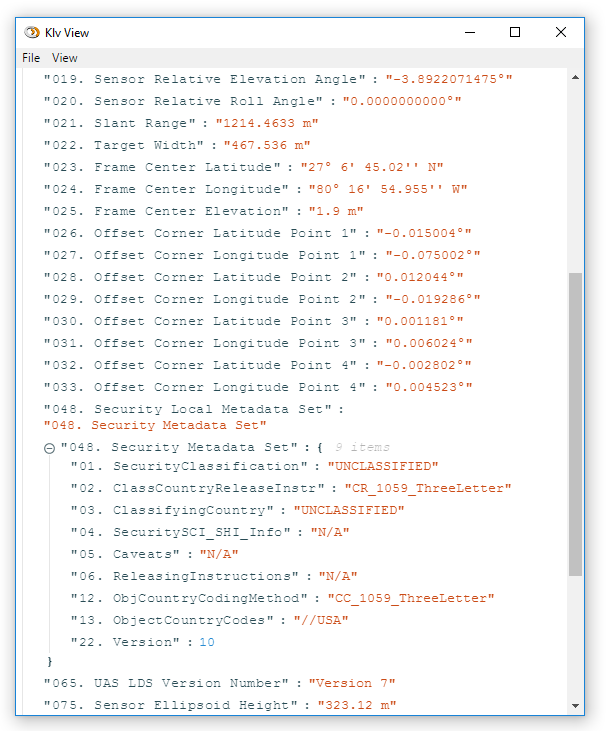
Figure: Reviewing detailed JSON output.
The resulting output can then be reviewed in STANAG-aware tools.
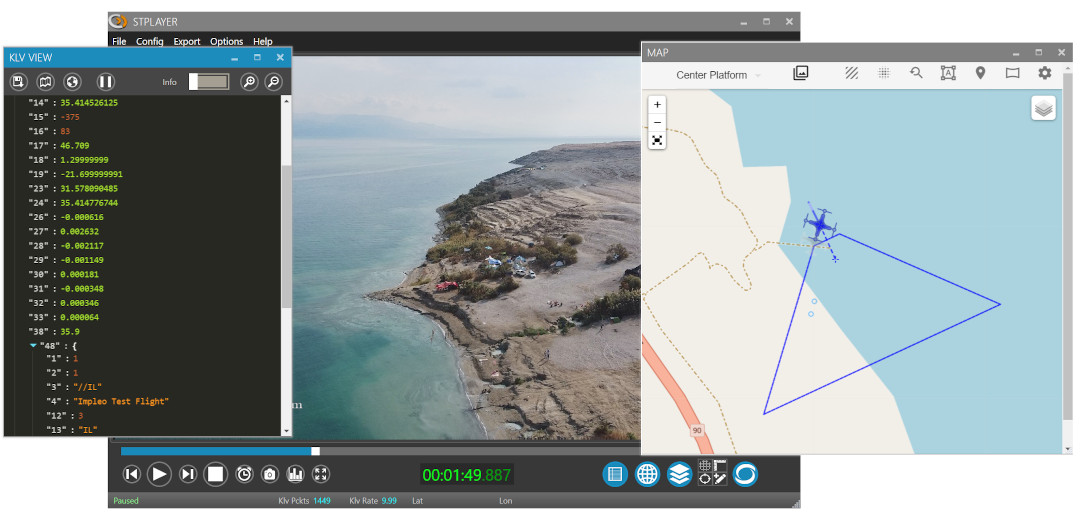
Figure: Reviewing the result in STPlayer.
Because the generated stream now contains footprint information, you can also visualize the filmed area or derive heat maps.
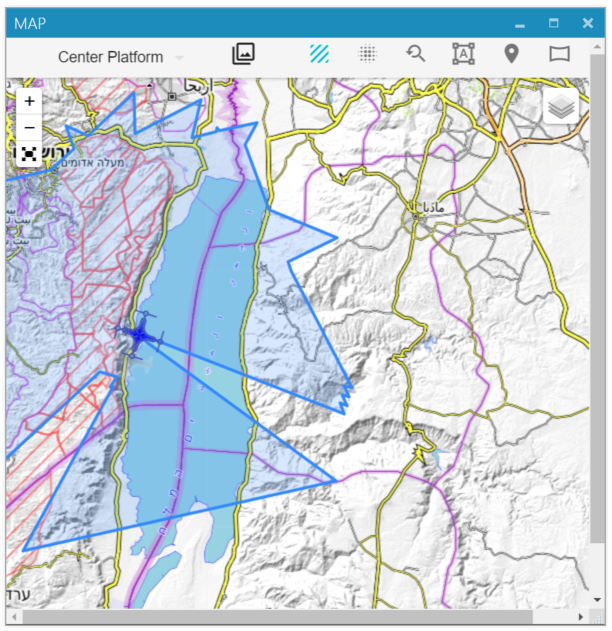
Figure: Estimated filmed area.
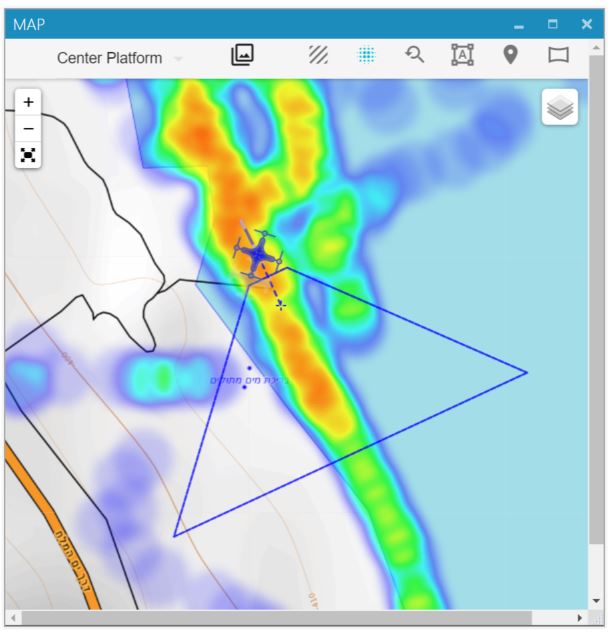
Figure: Derived heat map view.