STANAG On Demand Server provides a low latency Live FMV playback functionality without a need in browser plugins.
There are two LiveLowLatency modes:
- LiveLowLatency
- LiveLowLatency2
LiveLowLatency
In this mode, net source / decoder / renderer components and sync mechanism are split between server and client.
Prerequisites:
In order to operate low latency Live FMV playback you must have one of the following installed and configured:
- Redis DB
- RamDrive or SSD.
Installing Redis
Installing Redis DB is pretty straightforward using the installer package available from the
Redis.io
web site.
You can use Windows installer for Redis and run it as a Windows service.
Configure Redis.
There is no special configuration needed if it is run locally. If for some reason you need to change a port, you can edit a corresponding redis section of the "\StServer\data\config.json".
If you need an uncompressed frames for real time image processing, you may configure a folder where these images will be saved. To get a better results it is highly recommended to install a Ram drive module on the server. For example, the following Virtual Disk Driver can be used - ImDisk
You can download ImDisk Toolkit and use RamDiskUI to configure the Ram Disk.
- Configure RAM Drive.
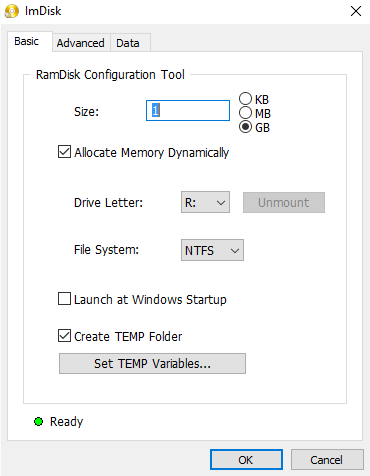
- Configure RAM Drive.
- Make sure a ramdrive section of the "\StServer\data\config.json" file points to the correct location. {"db": {"connection_str": "mongodb://localhost:27017/db"},"license": {"key": "57634006-CD1B8A78-F5EE465A-D5D4D008"},"ingester": {"path": "./dlls/SegmentIngesterProc.exe"},"player": {"path": "./dlls/KlvPlayerRawCapture.exe"},"ffmpeg": {"path": "C:/Utils/FFMpeg/bin/ffmpeg.exe"},"ffprobe": {"path": "C:/Utils/FFMpeg/bin/ffprobe.exe"},"redis": {"connection_str": "http://localhost:6379"},"ramdrive": {"path": "R:"}}
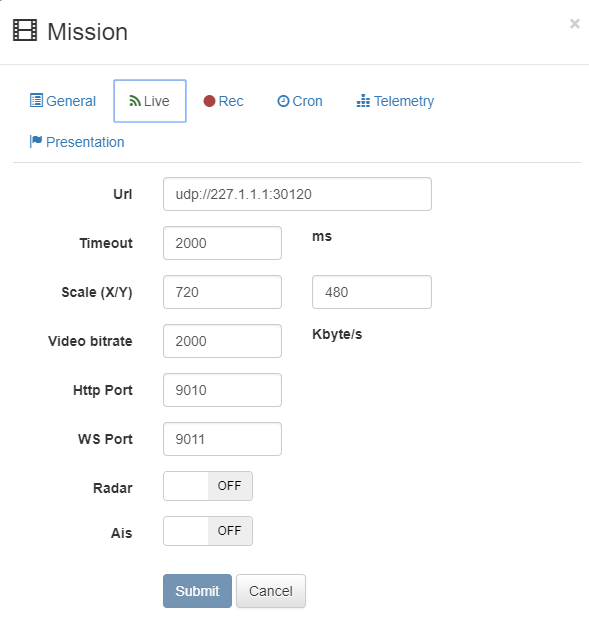
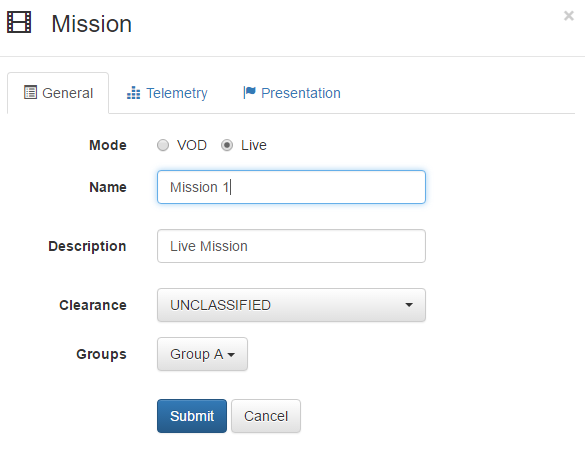
- Create Live mission.
- Next, select the created Mission and configure a network related parameters.
In order to select the network interface (if you have more than one) add nic= argument to the url. For example:
- Note
- Network interface selection is different for Live Low Latency and Live HLS modes.
Another posibility is to change network interface priority in Windows or add IP route to the routing table.
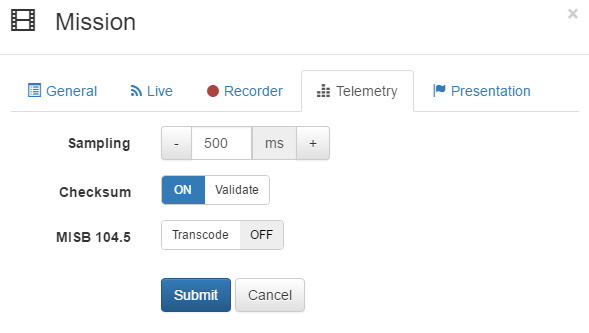
- Configure telemetry related parameters, if needed.
- Start live mission playback / recasting.

- Note
- The latency can greatly vary, it depends on many parameters (stream profile, network jitter, etc), but in general, it is possible to achieve a sub 100 ms numbers in optimal conditions.
LiveLowLatency2
LiveLowLatency2 mode uses lower bandwidth than LiveLowLatency mode but may not provide smooth video and exact video / metadata sync.