Starting the Server
- Make sure the MongoDB is running (you can run as a service if it is installed locally on your PC)
- Go to the install directory ("C:\\ImpleoTV\\StServer" by default) and run the server, for example “forever app.js” or serverStart.bat.
- If you want to set the port, you can pass it as -p <port> argument, for example “forever app.js -p 8080”
- Open your browser and point it to http://localhost:8080 (or whatever port you set using -p argument)
- Note
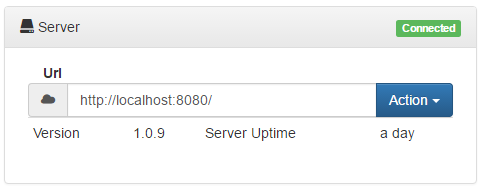
- By default, the server url will be the one you've selected in the browser. If you want to access another backend server (different from the server your front end is hosted on) you can set it as shown below:
Open Settings page, configure the server http://localhost:8080/, add and save it.
Creating User
- Sign Up, creating a user.
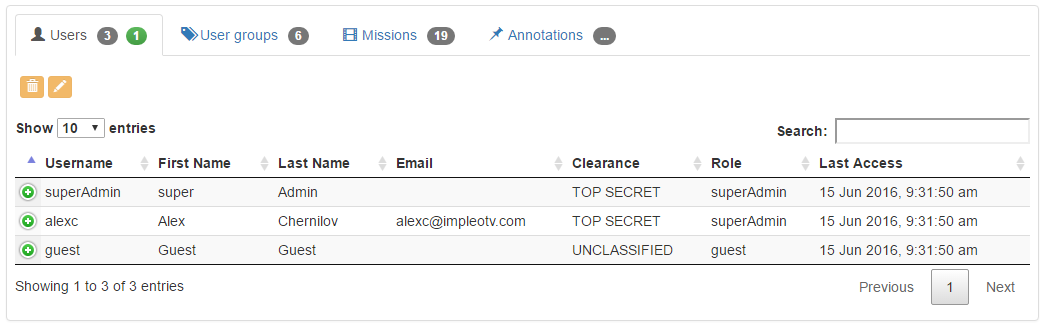
- Now you have to assign the admin rights to your user. Log in as superAdmin :

- User: superAdmin
- Password: 123456
- Go to the Admin page and assign administrative rights to your user.
- Go to the Home page, log out and log in with your user.
Configuring the Server
It is possible to select different servers or databases
- Go to the Admin page and change the configuration, if needed)

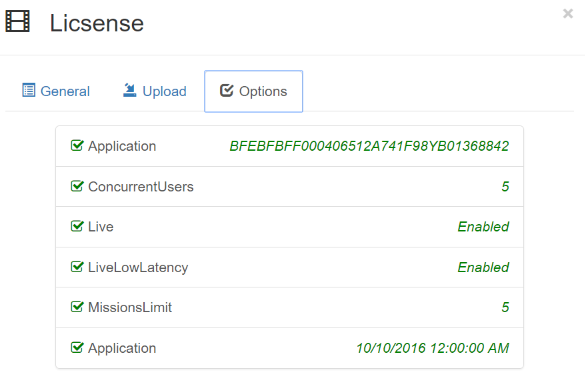
Setting the License
- Go to the Admin page and open a License dialog (press License button)
- Select the Upload tab and drag there your license file. \ll Paste the License Key into corresponding field.
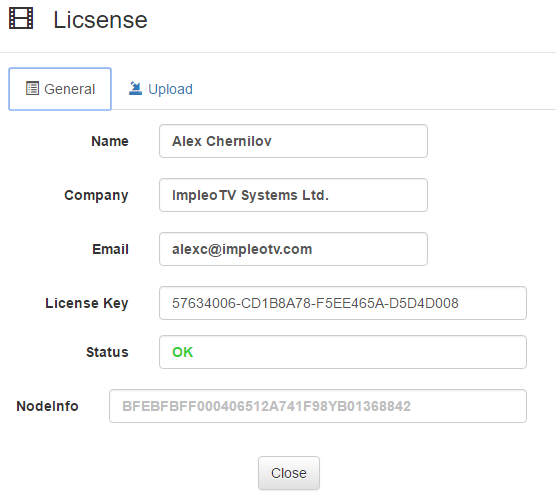
The allowed options are shown on the Options tab.
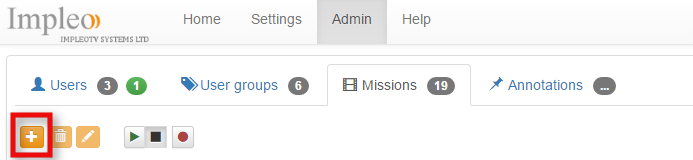
Creating VOD Mission
- Go to the Admin page and press Add Mission button.
- Fill some general info about your mission, select the working mode (HLS, File, etc) and assign mission Clearance and Group
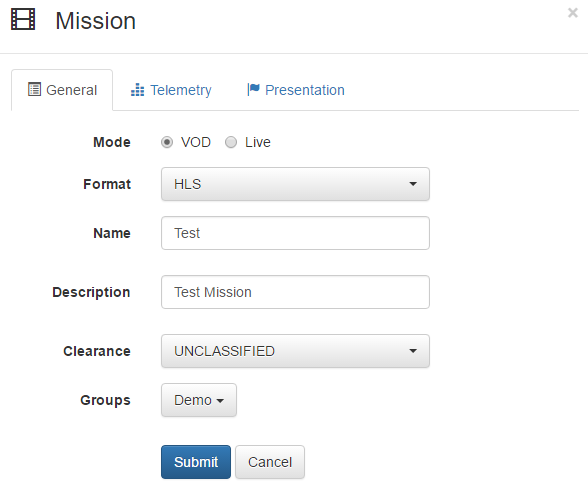
- Configure the presentation properties and Metadata sampling frequency (set 0 if you want all the metadata packets to be ingested) at the corresponding tabs.
- Press Submit button. Your (empty) mission is created now. It should appear in the Mission table.
- Select the created mission in the table and press Edit button.
- You can configure some advanced telemetry processing parameters in a Telemetry Configuration page.

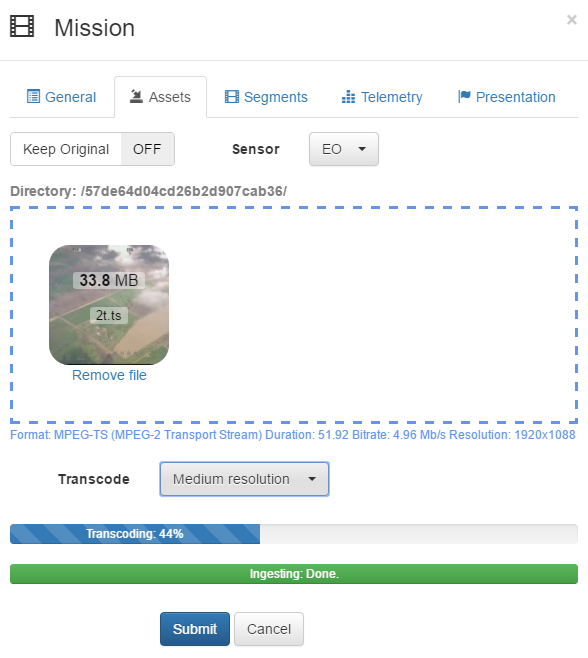
- Select the Assets tab. Generally, you can upload different assets here: STANAG files, transcoded representation files, extracted metadata files, etc. Depending on the working mode, you may decide if the transcoding is required.
- Note
- Remember, you should start from uploading an asset that contains telemetry metadata (like STANAG / TS file). Sometimes, when you have a big MPEG file with a high bitrate, it is better to extract the metadata (to the .bin format) and upload it, instead of uploading the video file which won't be used after metadata extraction / transcoding. So, in this case, you can do the transcoding on your local PC and upload only the metadata followed by the transcoded representation (with the same name). To extract the telemetry metadata you can use Impleo's KlvInspector with metadata extraction option).
Creating HLS VOD Mission
For HLS VOD missions, where you can have hundreds or even thousands of segments the above method is impractical. In order to deal with uploading and ingesting of large number of files pack them into the .tar file (without compression) and upload the resulted archive.
Once upload process is complete, the asset is ingested into the system. If transcoding mode had been selected, a new media representation is created.
You can use CDN for streaming. For example, to use Amazon S3 as a streaming server, set CDN url for your media representation.
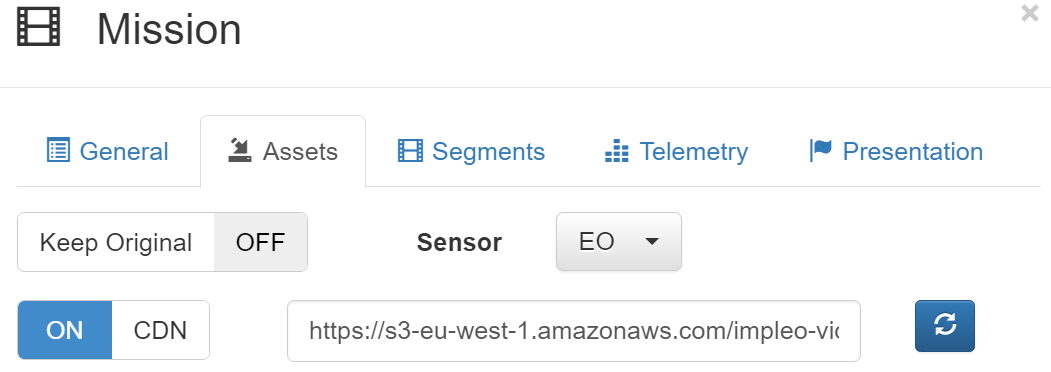
Your original representation on the server is not used in that case (and can be removed).
- Note
- If you already have a transcoded video in mp4 or webm format, you can select Do not transcode option and just upload the relevant video segments (with the same name), saving time and bandwidth.
If KeepOriginal option is switched off (default), an original master STANAG (or metadata) file will be deleted when Submit button is pressed. If you prefer to keep the uploaded master file, switch on this option.
- Note
- The created mission won't show up at the Home page until it is ready for playback (the state is not equal to Created).
When you create a new mission, the Mission dialog is pre-filled with the parameters of the last created/edited mission, except the User Groups (for security reasons). This will make the process of creation similar missions faster.
Basic Operation
Playback
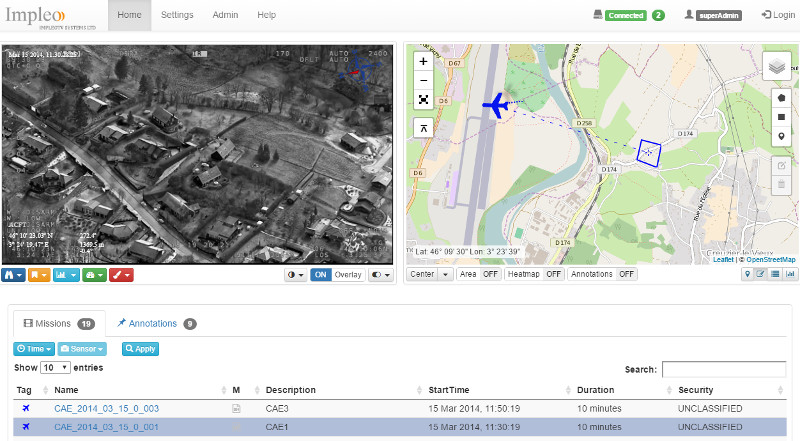
- Select the Mission in a Mission table to start playback. You can control the player with the buttons that will appear when you move a mouse over the video.
- Note
- Please note, when you operate Overlay controls, the player buttons will be hidden in order to allow access to entire video area. You must close Overlay controls in order to operate a player.
There are various controls located just under the player window:
- Goto stream time. Go to specific movie time (the metadata information must be present in the stream)

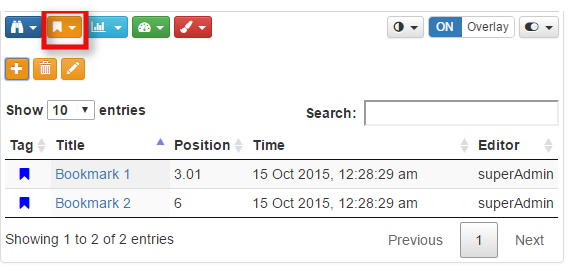
- Bookmarks. You can create the bookmarks and later use them to access the specific segments in the video.
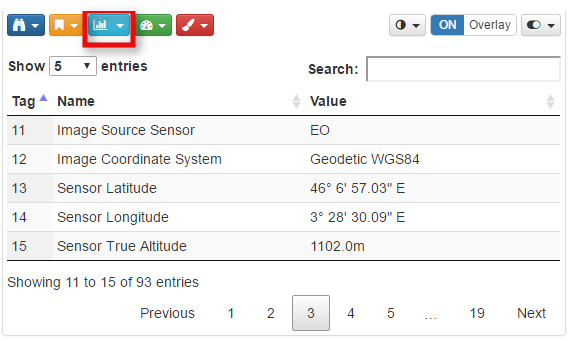
- Telemetry. The STANAG metadata can be previewed.
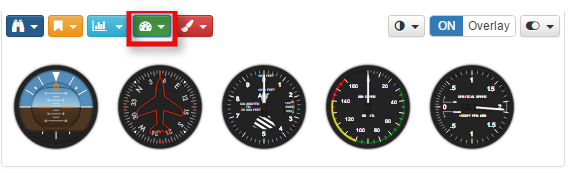
- Gauges. Flight instruments controlled by metadata present in the stream.
- Overlay. Overlay controls provides many useful tools for ISR mission analysis.

For more info on the Overlay control functionality please see Overlay Control
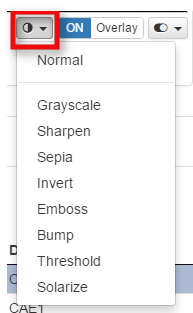
- Video processing. It is possible to apply some video processing filters.
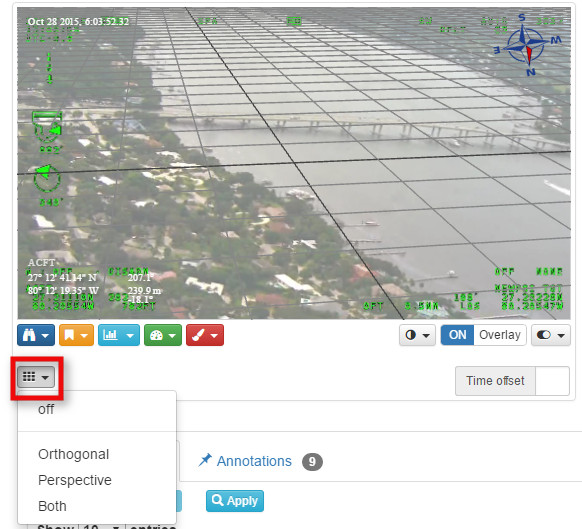
- Grid. You can overlay Orthogonal or Perspective (aligned to North) grid.
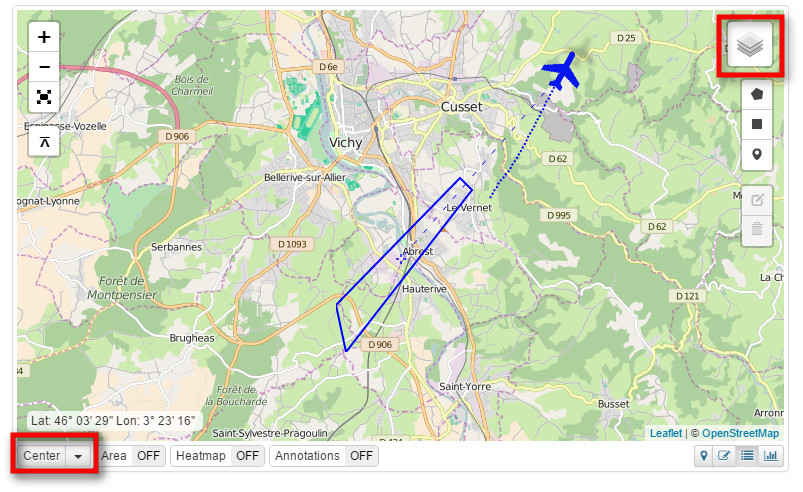
- Map. When your \d Mission has MISB metadata, the video footage and a platform / footprint presentation on a map are synchronized. You can select different base maps, control how the map is centered and what is included into its bounded box.
- Filmed area. You can show on a map the entire filmed area in order to have a better idea what is in your video.
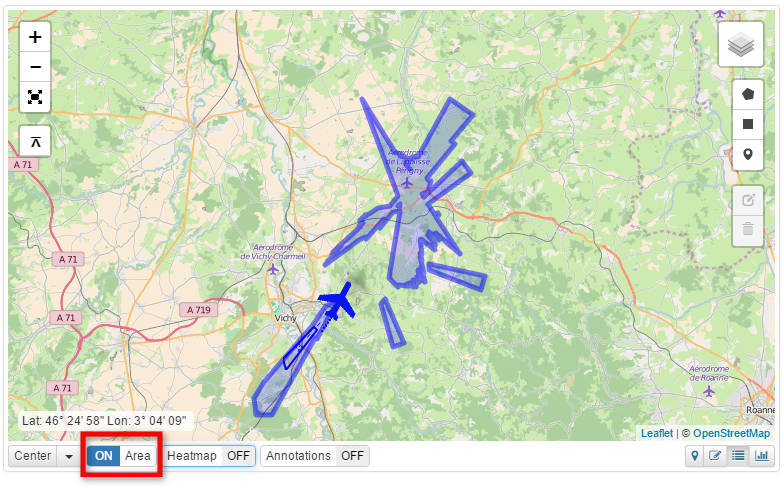
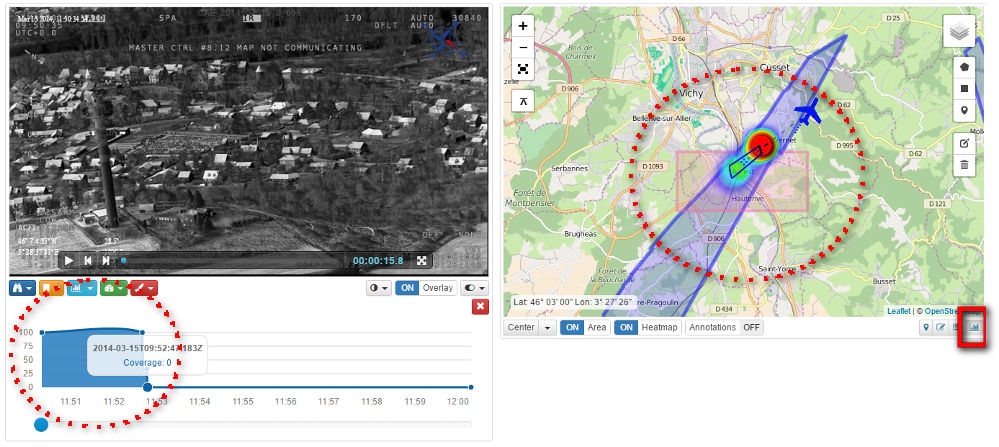
- Camera heatmap. Sometimes a more accurate information on the filmed area can be achieved by selecting a Heatmap feature. While a Filmed area view shows the polygon that includes everything that has been filmed, even for a very short period of time, the Camera heatmap gives you a clear presentation on where the camera had been pointed to most of the time.

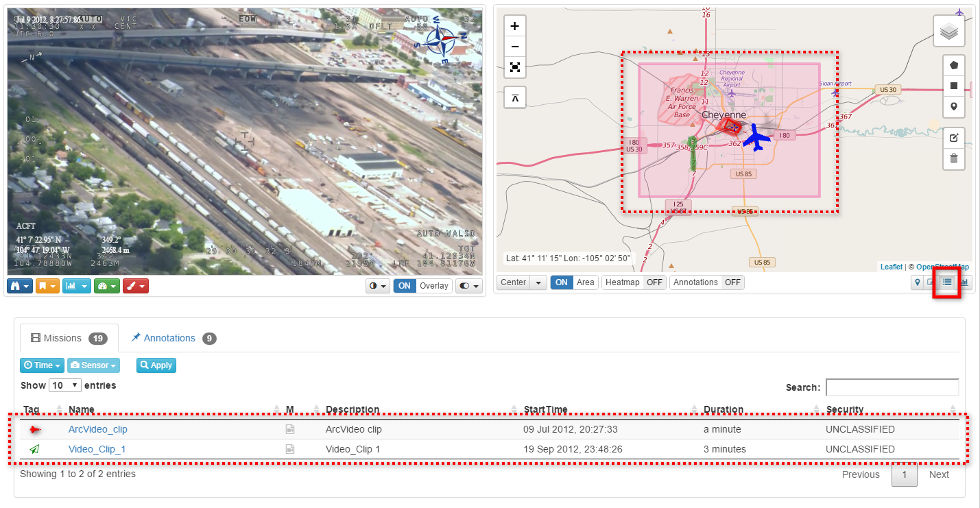
Filmed area query
Goal: to find missions that contain a video taken at the particular region of interest.
- Press Missions coverage query button under the map.
- Use Drawing tools on the map to select the desired area. You can draw a rectangle, polygon or just set a marker point.
- Your web client will now query the server and return a list of missions that covered the selected area. Mission panel should now only contain the relevant missions.
- You can add an additional criteria to your search, for example, restrict the search to the specific time range.
- Video coverage query. Another, extremely useful tool is a map query that graphically shows where exactly in the video clip you can find the places selected on the map. As shown below, the place selected on a map had been only filmed at the beginning of the mission, so if this is the only location we're interested in, there is no need to go over entire video.
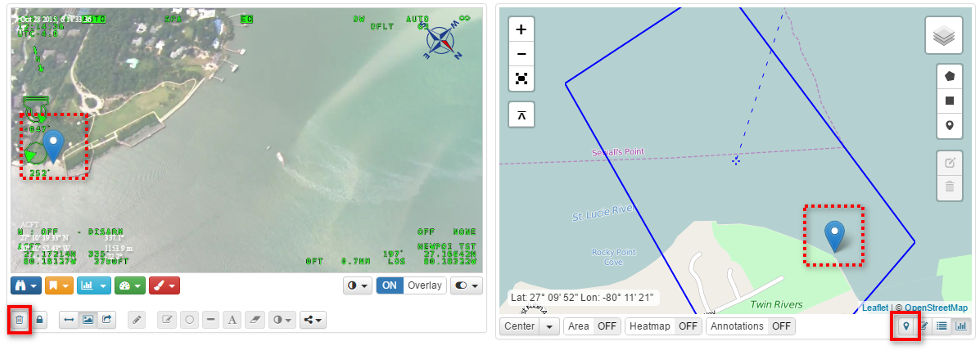
- Marker. Enabling and moving a Marker (either on a video or on a map) will result in a geo synced marker movement at the other side.
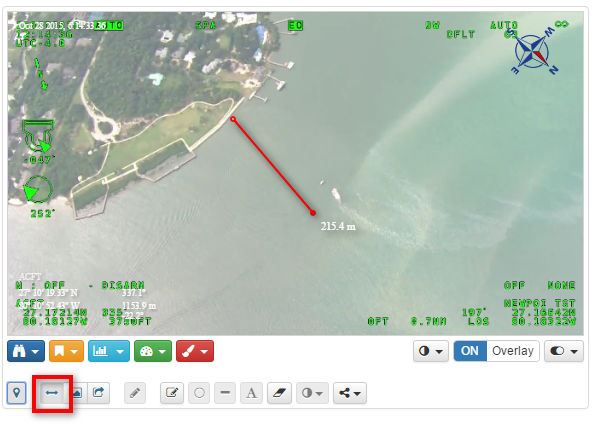
- Ruler. You can measure distances with Video ruler